

How to create a PCB symmetrical shape for a cute badge in eagle software
How to create a PCB symmetrical shape for a cute badge in eagle software

Designing a PCB frame in Sketchup:
Draw a PCB shape model that you want in SketchUp software in actual size using metric units (mm).

Export as 2D Grapics File:
Before exporting the shape, the design you made is a closed area.
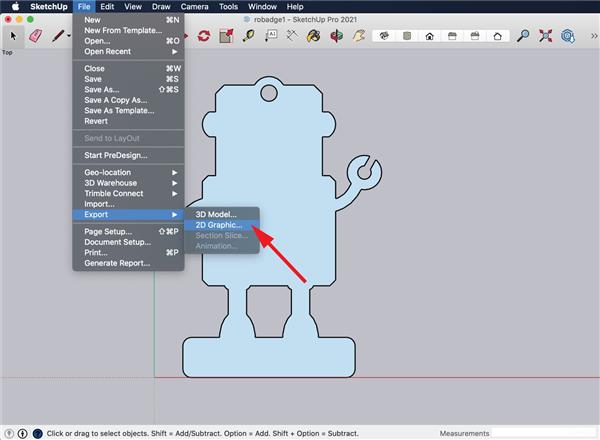
Save as as .DXF file:
Select the extension format as AutoCAD DXF File (.dxf).

Open Software Eagle (.brd):
Now open your project file with the extension .brd using eagle software, then select the "Run ULP" icon.

Importing DXF file into your .brd project:
in the ULP dialog box, browse "import-dxf" then select it, press OK.

Configure DXF file that will be import:
The DXFIMPORT dialog box will appear, set some parameters:
- Select the .dxf file that you want to import
- Change the target layer to 20 Dimension
- Select the input units to be Metric(mm)
- Set the width of line to 0.2
- Then press OK

Importing DXF file done:
The outer frame of the PCB that you created has been successfully imported.
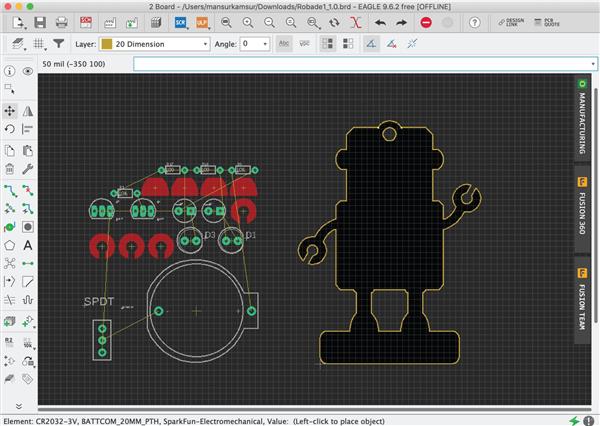
Continue the PCB design:
Now you can start placing components into the area inside the frame of the PCB.

Route all of Airwire:
After placing components finished, continue to route all of Airwire.

Add text and remarks as Silkscreen:
Add text and remarks as Silkscreen on the top and bottom layers of your PCB project.

Generate Gerber files:
The last step so that your PCB can be printed you have to generate the Gerber file, press the "CAM Processor" icon

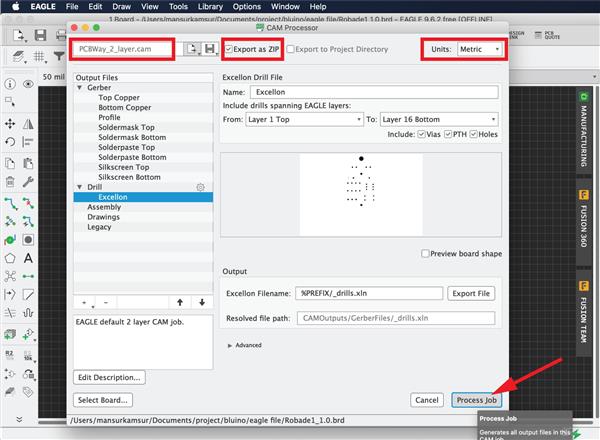
Configure before generate Gerber File:
On the "CAM Processor" dialog box, select the CAM file that matches the PCBWAY factory settings, you can download the file here
PCBWay_2 layer.cam. Select Export as ZIP, then set Units to Metric. The last click "Process Job", wait until process of Gerber file generated.
Start to Order PCB on PCBWay.com:
Before starting to order PCB, you can check the your Gerber file that you have created, upload the file here Online Gerber Viewer and check it to prevent errors when the PCB is printed.
After everything is good you can continue to order PCB by going to the pcbway.com then clicking Instant "Quote Now"
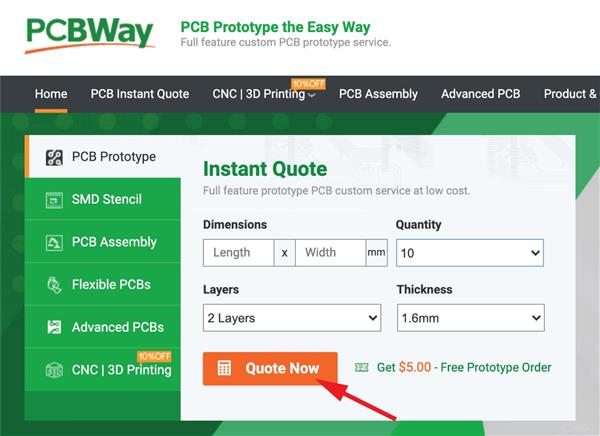
Set PCB specification for your Order:
PCBWAY is great PCB manufacture, you can order Prototype PCB 10cmx10cm only $5 for 10 Pcs (2 Layer) high quality PCB.
Some parameters you need to be set:
- Set quantity to 10 Pcs
- Select 2 layers option
- Make sure your PCB design with min. track/spacing 6/6mil for $5
- Select the color of PCB masking
- Specify the destination country of delivery and delivery service to be used.
- If you are finished click "Save to Cart"

Upload Gerber File:
After you have finished making an order, the next step is to upload the Gerber zip file that you generated earlier, then click "Submit Order Now".

Check Out your Order PCB:
Your PCB Gerber will be processed by PCBWay to be checked if there are mistake, the status your order is "Being review" if all OK be "Passed Review" and you can go to the "Check Out", you have to fill in the shipping address and the amount you have to pay and choose the payment method.

Your PCB has come


No comments:
Post a Comment